Showing posts with label tutorial. Show all posts

Monday, August 2, 2010

Circle runners


1st trace two different size circles on to manilla folders. Cut out with x-acto knife on mat.
Place circles on to ironed fabric, and cut fabric 1/2" from edge. I also cut corners off.
Place circle outline, fabric, and in close into aluminum foil, and iron edges. Let cool.

Remove fabric circles. Iron on heat & bond paper on to smaller circle to adhere to the larger one. Apply heat & bond to larger circle. Embroider edge . Now add same size fabric circle to the under size, and iron.
While we were in Albuquerque I was able to purchase some beautiful fabric for Kaya's room. I wanted to make these circle runner which I saw a tutorial for on Anna Marie Horner blog site. I've been wanted to do this project for a while now, so I was really happy when I finally got the chance to use this idea in my monkey's room. They really are unique. Now I just need to figure out when else to add circle runners???

Thursday, July 15, 2010

Fabric Flower Power


My friend Erin has a beautiful sister named Alicia. There are many things I appreciate about Alicia. One of which is she is a crafty girl who loves to share her projects through her creative blog The Charity Wedding. When I first read about this craft project I got so excited! I couldn't wait to give this a try. Alicia suggested I make headbands for my little monkey, and that's exactly what I did! Here's how:

If you click on to the above blog site you can follow Alicia directions. I'm just a big fan of freezer paper I just created my own template by outlining bowls from the kitchen.


Next use an x-acto knife, and craft pad to cut out circles.


You must use systhetic fabric for this project. Use the circle template as your guide to cut out fabric circles. You can use a straight pin to hold template to fabric, or just hold and free hand cut. Now cut 5 straight cuts towards the center to create petals for flower. I also cut edges off to help form the petal shape. See above. Now light a candle and place individual cut pieces to the flame. The flame will create these beautiful wilted, curled edges. Once all done. Stack your petals, and add fleece for backing.

Now hand stitch together. I also stitch on to head bands and a tank top.


The possibilities are really endless. I was thinking about add to a homemade denim purse, or making them for Kaya's little girlfriends. Thank you Alicia for a easy, fun, and beautiful craft idea. I can't wait to make more.

Saturday, April 11, 2009

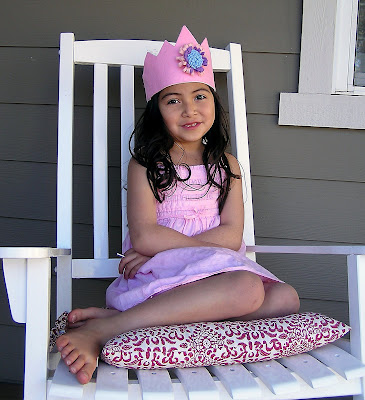
No sew princess crown


1. Apply heat n bond to felt.
2. Outline a crown, and cut out with scissors.

3. Cut out strap for the back of the head.
4. Remove advesive backing, and iron all pieces together.

I love how cute this turned out. My little monkey loved it!

Sunday, March 22, 2009

Pretty bows

Cut strips of felt, fold in half, and sew one side. Cut out 2 green leaves.
Cut along edge.
Start from one end, and roll. Sew to secure.
Put second strip on top, and roll. Secure by sewing.


You can embellish bow with buttons if you like. These bows can be use many different ways. I'm planning on using some to create hair accessories, pins for Kaya, and make baby hair bands for Easter gifts. Their are beautiful, and fun to make.

Friday, October 3, 2008

Homemade Pumpkins

I was making more of these holiday pumpkins, so I decide to photograph the process. Mainly for my own reference because I was afraid I'll lose the link to the instructions. Here a photo tour.

Cut 2 squares any size. Fold in half, and pin. Stitch folded corner.
Cut off extra fabric
Make pumpkins stems, and stuff.
Open up stitched squares, and pin right sides together with finished pumpkins stem. Make sure stem has unfinished edge at top of pumpkin, and pin. Like shown above.
Outline your curve with pen.
Start sewing from botton, and follow line guide.
Trim off extra fabric.
Turn inside right. Now stuff! You can weight down pumpkin with a rice pouch, or hand stitch close.
I love them, and they are so easy. Thanks Amber!

Friday, September 12, 2008

Halloween Blankets

The holiday season is in the air!


I've been in a sewing mood, but still only want to do easy projects. I've never made the monkeys holiday blankets, so I decided to give it a shot this year.

Here are my supplies: Decorative fabric cotton, fleece fabric, matching thread, batting, Heat n Bond, and bias tape double single fold.
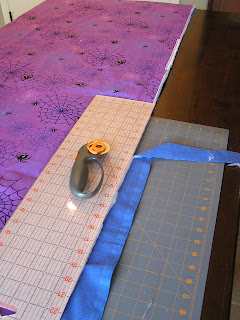
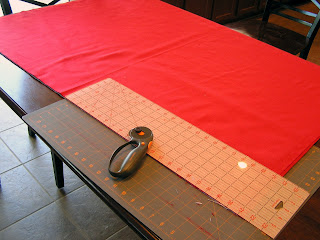
Wash, and iron fabric. Layer fabric, batting, fabric. All right side out. Pin, and trim excess fabric off. I used a fabric mat, and a rolling fabric cutter to do this. Iron Heat n Bond to bias tape as directed. Fold bias tape in half, and wrap around edge of blanket, and iron on. Sew edge with machine, or whip stitch edge like I did with embroidery thread. If you like you can embellish your blanket with words, or images. I back stitched a cob web, and the word BOO! The project is very similar to the baby blanket project I blogged about. Check out those photos.


Here's Remy my monkey with his blanket. He sleeps with it every night. I'm glad I made this for him. One down, and two more to go...

Saturday, August 23, 2008

Baby Blanket

I know this is a simple project, but there are many different ways to make a baby blanket. Most baby blankets are made with a cotton blend fabric with batching, but today I wanted to make a warm, thin, soft blanket for my expected nephew. The fabric I'm using is flannel. This project is easy, and a good one to try with a beginner. Here's what I did.

Supplies: 1 yard solid flannel, 1 yard printed flannel, bias tape, heat n bond lite, thread, scissors, iron, and ironing board.

First iron the fabric. Place fabric pieces together with the right side out. Make sure the the edges of the fabric are square, and meet. If not, use a pair of scissors to trim off extra fabric, or you can use a fabric cutting board with roller scissors like I do and trim . Once this is done all you have to do is add heat n bond to your bias tapes according to the directions. Then iron bias tape along the surrounding edge of your blanket. No straight pins needed. Now sew along edge of bias tape to secure everything. Finished!!! How easy is that!!!


Monday, July 14, 2008

Another Fabric Silhouette

I've just finished another fabric silhouette for Kaya's room. I think it turn out pretty cute. I can't wait to make more. Here's the link for the direction again...